How to Storyboard a Video
You will feel more motivated to create a video or film if you have a big picture of the outcome in your mind, along with general details about the process.

Video storyboard turns even vague ideas into the actionable steps you have to do to implement them. And you don’t even need to be a specialist or have sophisticated software. Video storyboards can be as simple and primitive as child drawings, created with only a notebook and several marker pens. Let’s dive deeper into the definition of storyboards and tips on how to storyboard a video.
Video storyboard definition
So what is a video storyboard? A video storyboard is a representation of your video with the help of different sketches that describe the subjects of the shot, its type, and the movement. John Lasseter, the Chief Creative Officer at Pixar, calls the video storyboards “a comic book version of the story. And that’s exactly how they look.
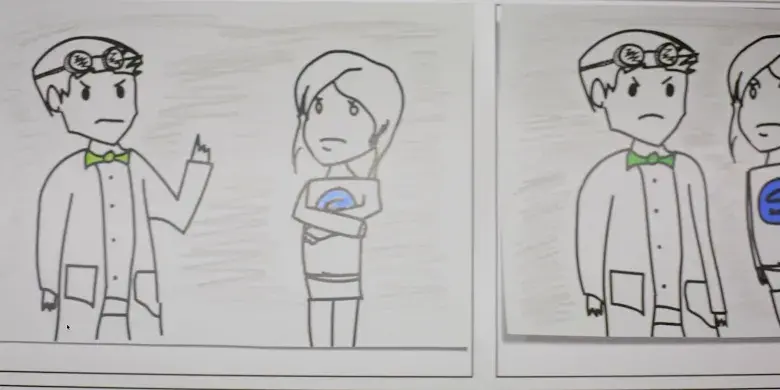
Video storyboards may also include notes with the descriptions of the scene or what the characters say. It will help you get a general picture of your film and better understand what you need to create each shot. Moreover, you can share your storyboard with anyone you want. Get early feedback and make changes at the planning stage, not while already filming. As a result, video storyboards not only optimize the process but also help you save money.
The main elements of the video storyboard include:
- Story itself
- Characters
- Dialogue
- Time frame
- Camera details
You can add or remove different elements depending on the complexity and duration of your film or video.
Why is it important?
Many video makers tend to ignore the storyboarding stage and think that it’s a waste of time. But the fact is that storyboards will save you tons of time later while filming.
Do you know the saying “A picture is worth a thousand words”? Storyboards make it easier to share your vision with your investors and colleagues and ensure that all your team stays on the same page. In such a way, everyone will see how your video will be mapped out and what it will look like. It will help you avoid misunderstandings in the future.
Also, with the help of storyboards you can make your video structured and plan it more specifically without missing any details.Try to imagine the storyboard for the video project as a plan for your production that includes all the shots you need and their order, and the interaction of the visuals with the script. And as we’ve already mentioned, storyboards help you spend less time and money. It will decrease the number of revisions and changes and make your overall process more smooth.
Types of video storyboards
There are different video storyboards, but they all share the same purpose – to help you visualize your ideas. The type of video you will make determines which storyboard type to use to map out the story’s flow in the best way possible. Let’s review the most popular types of video production storyboard.
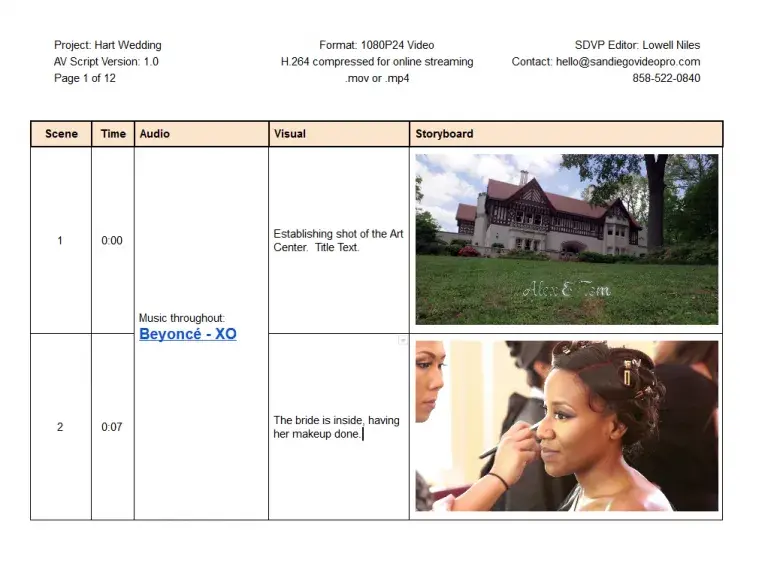
- Photo storyboard
One of the easiest ways to storyboard the video is to take photos that visually describe each shot. Here’s an example of such a sample storyboard for the video.
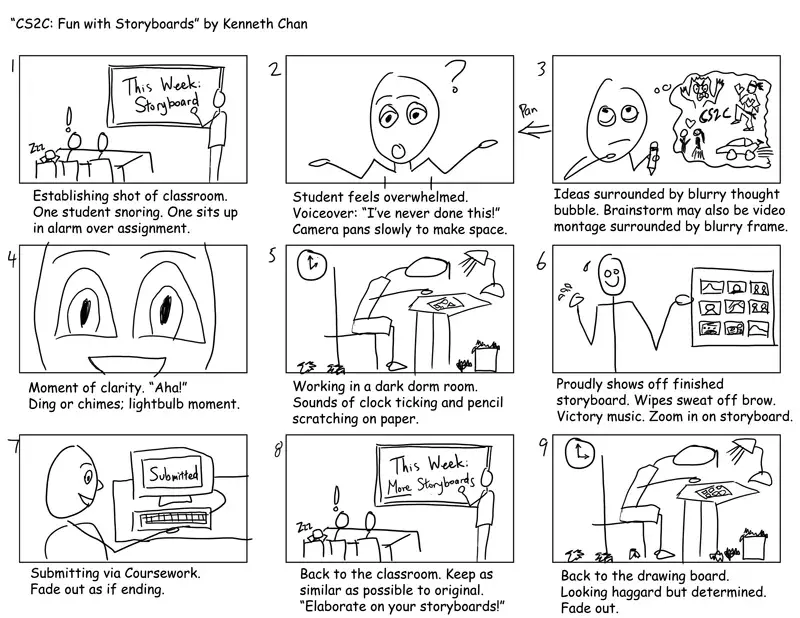
- Black and white sketches
These are roughly sketched storyboards with few details that describe the general point of your video.
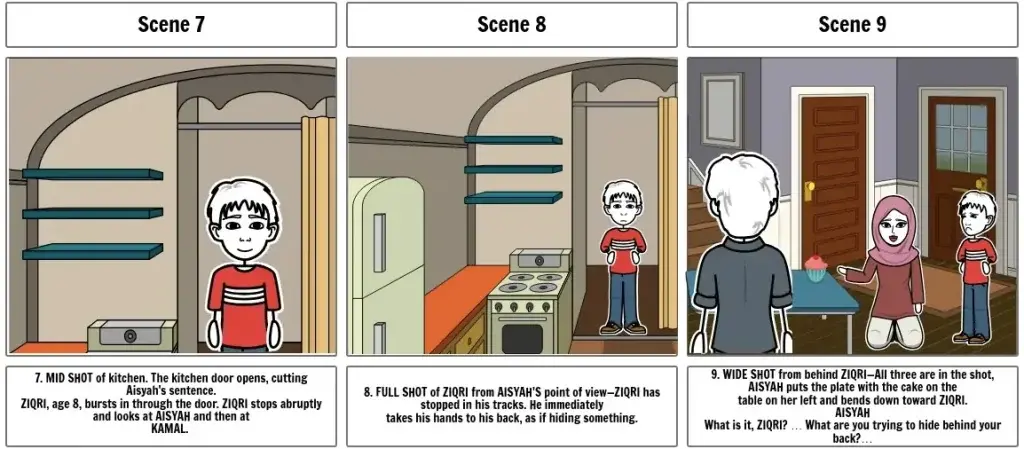
- Full-color storyboards
Full-color storyboards look professional and take a lot of time to create. It’s a great option when you need to represent the idea of your movie or video to multiple stakeholders or convince the client or team of your vision.
Video storyboard examples
To evoke your imagination, we have prepared the best storyboard video clip examples.
Austin Powers 3
The Austin Powers opening scene is one of the most memorable comedic set pieces of all time. Such a detailed shoot would be impossible without detailed storyboarding. The opening scene lasts for 3 minutes. It took 20 pages of storyboards to sketch it. The video storyboarding has helped Jay Roach achieve full consistency across all the scenes and make the viewer believe in what’s happening.
For example, one logistical issue they had to figure out was how to make Austin’s Shaguar appear as if it were driving itself. The solution was to disguise the stunt driver as the car’s front seat to sell the idea that no one is driving it. And you might even sneak up and see his hand touching the bottom of the steering wheel.
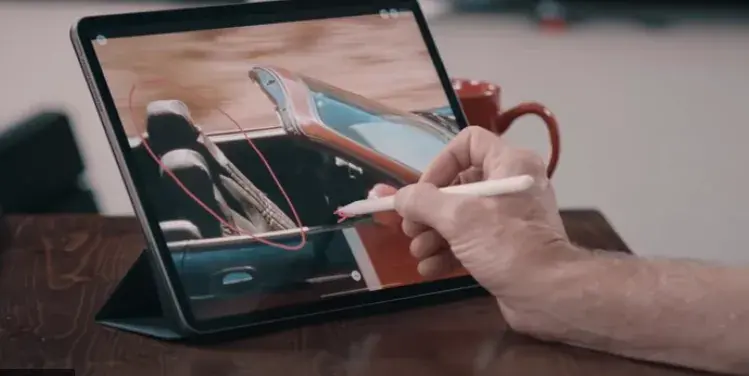
You can view all the samples of the videography storyboard here.
Moulin Rouge
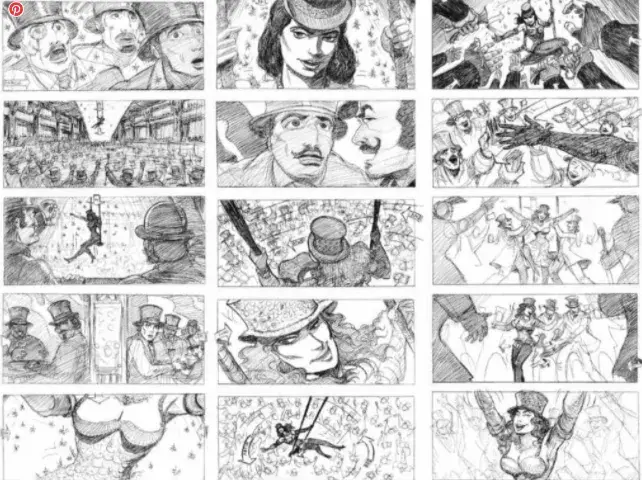
Moulin Rouge is an example of thumbnail storyboards – storyboards from small sketches represented on a few pieces of paper. They are small and less detailed, so they are perfect when you need to quickly catch and represent your ideas without getting into details.
Psycho
Psycho is a psychological horror film directed by Alfred Hitchcock and considered one of the greatest films of all time.
The most remarkable scene in the movie is the shower scene that pictures the murder of Marion Crane and is one of the most well-known moments in cinematic history.
Saul Bass created the storyboards for the film. Most of the 48 storyboards were shot exactly as he diagramed. It’s hard to believe how accurately they match the final shots.
“Interestingly enough, the storyboard that I did for Psycho went precisely as I laid it up, and there was no change on that,” Bass once explained in a television interview. “And frankly, I myself at that point didn’t even really understand the impact that some of these things would have.” He added: “I thought it was a neat little murder, and I thought it was pure. I liked its purity. I must say that when it appeared when I saw the thing in the theater, it really scared the hell outta me. And apparently of everybody else.”
Source
How to create a storyboard for a video?
Creating a storyboard for a video is a complex but very engaging process. Now let’s dig deeper into the process of creating a storyboard step-by-step.
Establish a Timeline
Your storyboard should have a clear structure. First of all, you need to figure out the sequence of events for your video and follow the order of opener – problem statement – solution – call to action.
Identify Key Scenes
Determine the key points of your video that will become its main focus and point of difference. Think about which scenes engage the viewer and motivate them to take action. Make sure you spend most of the time on these scenes.
Write Your Script
Your script should outline all the spoken words for the video and describe what’s happening in each shot. You can also add notes that will direct your animators or videographers, such as zoom, a pan, a tilt, or a specific transition for each scene.
Choose Your Storyboarding Tool
You can use just pen and paper or go into more specialized tools:
- Presentation software like Microsoft PowerPoint or Google Slides
- Graphic design software like Adobe Illustrator and Adobe InDesign
- iPad software like Adobe Photoshop Sketch (often requires a stylus)
- Storyboarding software like Amazon Storyteller or Storyboard That
- Storyboard templates like this one for Google Slides or this one from Vidyard
Annotate Each Scene With Details
Add the dialogue and/or voiceovers, directional notes for the people, and don’t forget to number your thumbnails so it won’t be too confusing.
Add Cuts
The moment when one scene ends and the next one begins is called a cut. A cut takes place any time you are looking at something from a new point of view, so you need to indicate in your storyboard where you want cuts or any transitions in the video flow.
Conclusion
Don’t neglect to create storyboards, as this is a vital component of video production. It will help you avoid mistakes, decrease the number of revisions, and map out all the key scenes before shooting the video itself. We, at Ninja, know how to make the most out of your video storyboard. If you want us to help you with the full cycle of video creation from the script to storyboard and animation, feel free to contact us.
